Feedback is incredibly dynamic and touchy, where the smallest adjustments and any changes in the signal path have a substantial impact on the resulting sounds. This makes it one of the most compelling ways to compose and improvise music, or to collect content for sound design purposes. In particular, applying feedback techniques with reverb effects can smear textures into entirely new, endlessly dimensional sounds, effectively turning an essential effect into an instrument of its own.
In our recent video entitled "Turning Reverbs into HARSH Instruments with Feedback," I show off some of the ways that I like to apply the ideologies of feedback patching to reverb effects pedals—with silly acronyms and all. Because feedback itself is incredibly nuanced and deep, this article exists as a supplementary companion, explaining some of the backstory behind each setup and its significance towards the greater picture of working with reverb and feedback. This is by no means a definitive guide to the only ways this concept could be approached, but simply a starting point for sonic experimentation.
Before we proceed, remember that working with feedback can result in sudden volume spikes, so be mindful of your ears and keep the monitoring volume turned down low as you get a feel for things. Using a limiter on the output path is also a great way to keep things under control, to spare your hearing from any potential damage, but generally the best thing is to simply keep the levels low as you're starting out.
Setup 1: No Input Mixing and Red Panda's Context
Among the easiest ways to get started with feedback is through a process known as "no input mixing." The concept is fairly simple—take an output from the mixer and run it back into one of its channel inputs, and the resulting feedback loop will bless you with a world of oscillations and drones. No input mixing is a whole world in itself that's beyond the scope of this specific article, where you don't even need to rely upon external effects to conjure up incredible sounds. If you're curious for more, our good friend Sarah Belle Reid has an excellent tutorial video on the idea.
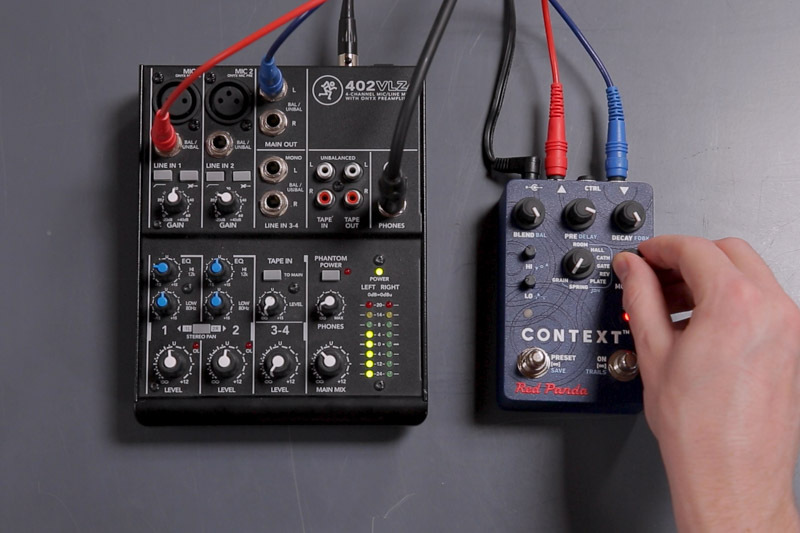
Of course, larger mixers with multiple auxiliary sends and secondary outputs will afford more complex routing options, but even a simple, compact mixer like the Mackie 402VLZ4 can be a ton of fun. Within the mixer itself, all of the resulting sounds will be shaped by whatever level, gain, or EQ controls fall in the feedback path, but of course this can be easily extensible by injecting other sound sources and processors into the feedback path. Adding a flexible pedal like the Red Panda Context makes for a ton of fun in sonic explorations.
One of the main reasons I chose the Context for this setup is not just for its versatility, but also in that its design is very immediate and hands-on in this context (pun absolutely intended). As mentioned earlier, any change in the feedback loop is going to drastically affect the sound, and having eight different reverb types available at the turn of a knob is incredibly handy, and for our feedback explorations this provides a way to instantly change the sound on a dime. There's also an internal delay and some kind of unique modulation effect for each mode, and the high and low damping controls offer us another way to shape timbres beyond the two-band EQ on our Mackie mixer alone.
With all the available modes, I found myself personally preferring the Spring and Grain reverb algorithms the most. I have a personal fondness for the sound of spring reverb feedback (keep reading onto the next section for more on this), and the inclusion of a tremolo effect on the Mod knob easily allows for imparting undulations into the sound. The Grain mode is fairly special compared to the others—it's based upon the Ursa Major SST-282 Space Station, an effect processor released back in 1978 that used a set of multi-tap delays to create reverbs. For my personal sonic preferences, this mode felt very malleable for the types of swelling drones I like to make, but great results can be achieved with all of the modes, or with any effect of your choosing.
Setup 2: Eurorack Spring Reverb Feedback Patches, ft. Light Pedal
As hinted above, there's a special place in my heart for feedback with spring reverbs. For the same reason many guitarists prefer real, vacuum tube amps pushing air through a stack of cabinets, I find feedback using physical components and moving parts to have a bit of special, organic magic. That's not to say I don't enjoy other types of reverbs or digital feedback (in fact, I can't get enough!), but the inherent design and timbral qualities of spring reverb very much aligns with my personal tastes.

We brought out the long awaited Light Pedal from Gamechanger Audio for this setup, and truthfully, it almost feels like it was made with feedback in mind. Spring reverbs are characteristic for their sound, where a lot of harmonic content is lost through mechanical energy. But the Light Pedal is unique in its usage of infrared sensors pointed at the springs, fleshing out the lost spectral content and affording the use additional effects that depend upon variable lighting levels, like optical tremolos and shimmer. The supplementary effects and reclaimed harmonic spectrum can only enhance our feedback journey.
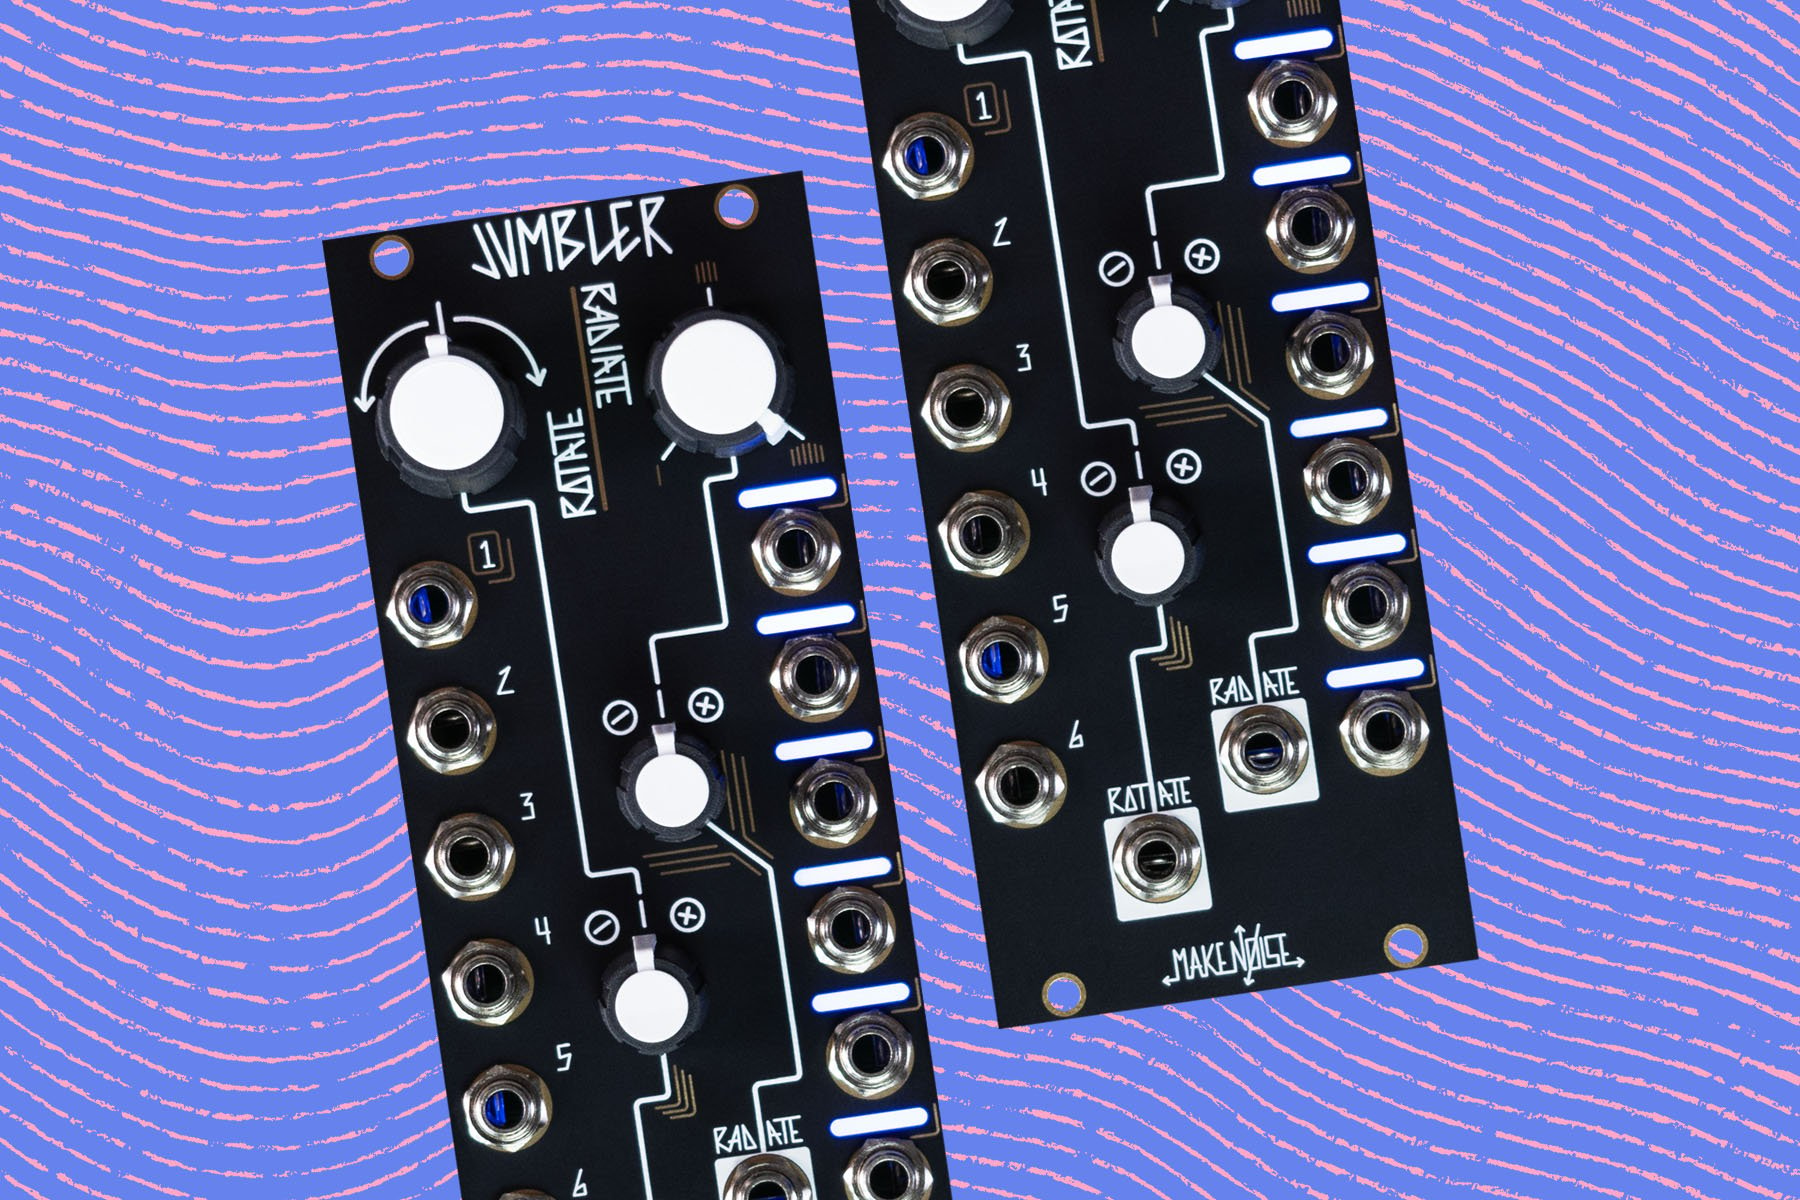
I've spent a lot of my time crafting feedback patches on my personal Eurorack system, making use of spring reverb further shaped by filters, with cutoff frequencies and resonances being shifted around by various random and other control voltages. The modules chosen for this setup actually very much resembles a condensed version of one of my favorite patches, with several Make Noise modules working together to continuously nudge our feedback patch in new sonic directions. Maths and Wogglebug are a perfect pairing for generating an abundance of complex modulations, while the multiple resonant peaks of QPAS and the flexible routing options available on the Optomix make for highly responsive timbre shaping.
There's another trick that the Light Pedal has up its sleeve to make our patches even more flexible: the built-in gate circuit. Gated reverb became rather trendy back in the 80s, when big hair and big snare drums dominated the music industry. In the context of the Light Pedal, our gate circuit is a bit more flexible. Turn the control to the left and the volume of the reverb increases with the volume at the input, but turn it to the right and the reverb will duck down for incoming audio. Now with traditional sound input this can be used to great effect, but for our feedback sculpting it's an incredible way to control our dynamics. The leftward gating acts like another level control, but the rightward ducking offers responsive control of our signal level. At mild settings, this will gently pad the output level, but more extreme settings will cut out the sound entirely or impart gated pulsing. This offers some cool insight into controlling your patch with its own signal levels, but we'll touch on some other ideas in the next section, too.
Setup 3: Exploring Envelope Followers with the Strymon Night Sky
Extensive patching with modular instruments and software environments like Max has left me spoiled, and I often find myself wishing I had envelope followers in all kinds of different scenarios. If you're unfamiliar, an envelope follower is a control signal derived from the amplitude of an audio signal, thus a higher volume will result in a higher level in our envelope follower. This is likely very similar in function to the signal working behind the scenes of the gate circuit in our previous setup with the Light Pedal, but bringing an envelope follower to the surface offers the advantage of shaping the response to our needs. We can often adjust the rise and fall time, or how quickly or slowly the envelope follower tracks changes in audio level, from quiet to loud and vice versa.
This time, we're working with the Strymon Night Sky, our trusty Mackie mixer, and a super compact curation of Eurorack modules. The Night Sky has a ton of ways to shape its sound on the pedal itself, and by providing dedicated stereo inputs and outputs, we can simply patch one output back into an input, and run the other output to our mixer. From there, we can monitor our output, as well as sending a signal over to our little modular synthesizer, featuring the Joranalogue Contour 1 as our envelope follower.
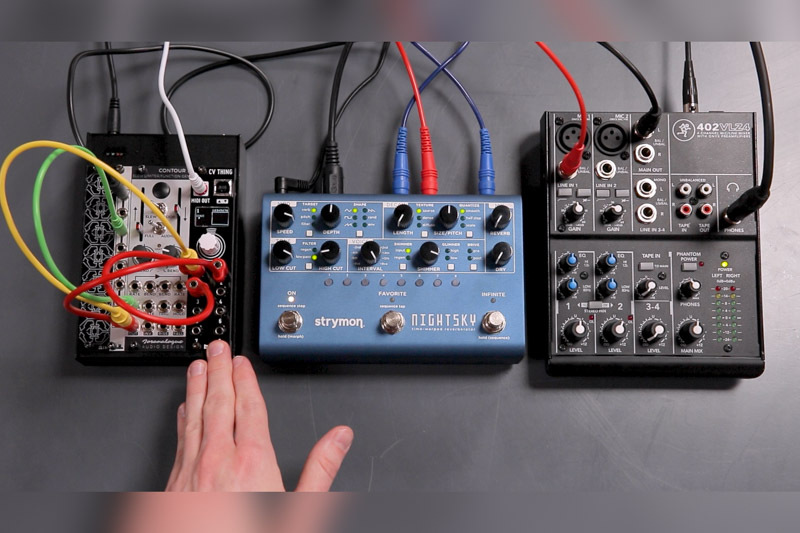
Now, astute observers might notice a glaring issue with our setup: the Night Sky doesn't offer patch points for its parameters, so how are we going to control it with an analog envelope follower? The Night Sky does have an expression pedal input that could theoretically accept our CV input, but for the convenience of easy parameter mapping, we're going to use the Befaco CV Thing to convert a few copies of our control signal into MIDI control change messages, or CCs for short. Even though we're patching the same exact signal into multiple channels of the CV Thing, it does offer us the convenience of scaling the MIDI data output. We can reduce the range from the full 128 values in the MIDI CC spec into something more subdued, and allowing us to invert the output should we so desire it, where a higher input yields a lower output.
On the Night Sky, we have quite a number of parameters available to us for control, with Size/Pitch, filtering options, shimmer intervals and levels, and more. After all, Strymon calls this pedal a "reverberant synthesis workstation," even boasting a modulation section that we can use with or even be modulated by our external control signals. For our video example, I consulted the Night Sky manual to map CCs 15, 20, and 23, to control Modulation Depth, Size/Pitch, the High Cut filter's cutoff frequency, which all fluctuate based on the envelope follower's response to the feedback audio.
Before we move on, I want to emphasize that you don't necessarily need to invest in modular gear to get yourself an envelope follower. Should you primarily work in the box, DAWs like Bitwig Studio and Ableton Live (with Max for Live) offer envelope follower devices that can be mapped to other parameters all across your project. In non-modular hardware, you could whip something up on the Empress ZOIA or Poly Effects Beebo, or invest in a dedicated audio-controlled synthesis processor like the Second Sound Unisyn, which also offers pitch tracking and synthesis capabilities!
Setup 4: Pitch Feedback, Shimmer, and Playable Reverb with the Night Sky
One way to quickly get wild results in any feedback patch is to add some kind of pitch shifting into the loop. Depending on the chosen interval, immense stacks of octaves, endlessly ascending whole tone scales, or dense microtonal clusters can provide new forms of weight and dimension to your patches. Night Sky easily provides this to us in its Voice section, with a few choice intervals and level controls for Shimmer, and by patching our feedback loop we can further shape the sound with its filters and modulation section.
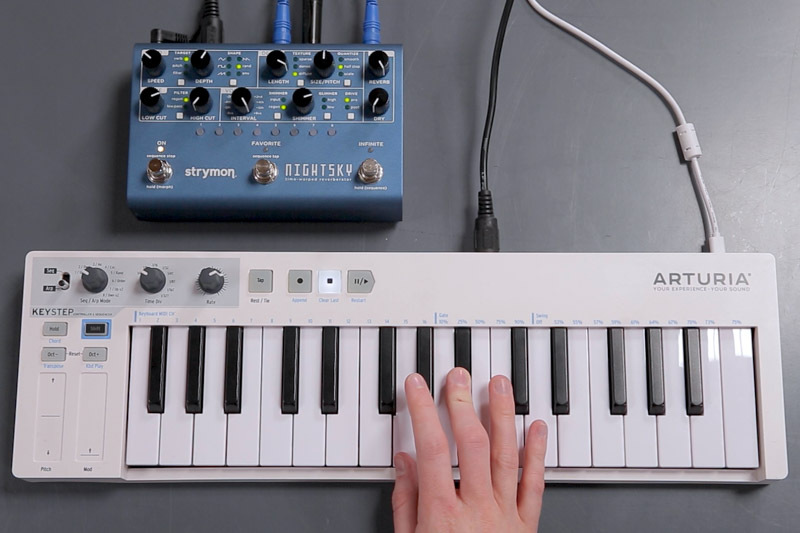
But the Night Sky offers another key pitch feature that's central to its design. Like a tape delay, the rate that audio recirculates through Night Sky's internal reverb buffer can be adjusted for pitch shifting effects. Where Night Sky takes this concept to the next level is through both its internal sequencer, and the ability to "play" the reverb buffer with an external controller. The Size/Pitch control can be set freely, or quantized to chromatic notes or a handful of other musical scales.
For my improvisation style and given the unpredictable nature of feedback, I prefer to have manual control over my patch to keep things under control, so I'm transposing the reverb with an Arturia Keystep. But that's not to say that those more bold and adventurous than I couldn't whip out the sequencer to get some automated changes happening.
Setup 5: Strange Convolution and Feedback with Beebo
In our final setup, we're going to explore a kind of reverb that up to this point has been relatively unexplored in the realm of hardware: convolution reverb. The finer details of convolution involve a lot of math, but the operation can essentially be boiled down to imparting the sonic characteristics of one sound onto another. Historically, the most common application of convolution reverb is to use an impulse response of a real space, like a famous concert hall or live room in a recording studio, and use it to process any audio signal as if it were being recorded in that space. IRs can also be captured from anything that processes audio, so you can attain the profile of things like iconic, vintage effects units, and with the rise of guitar amplifier modeling, we've seen this concept adapted for guitar cabinet emulation as well.
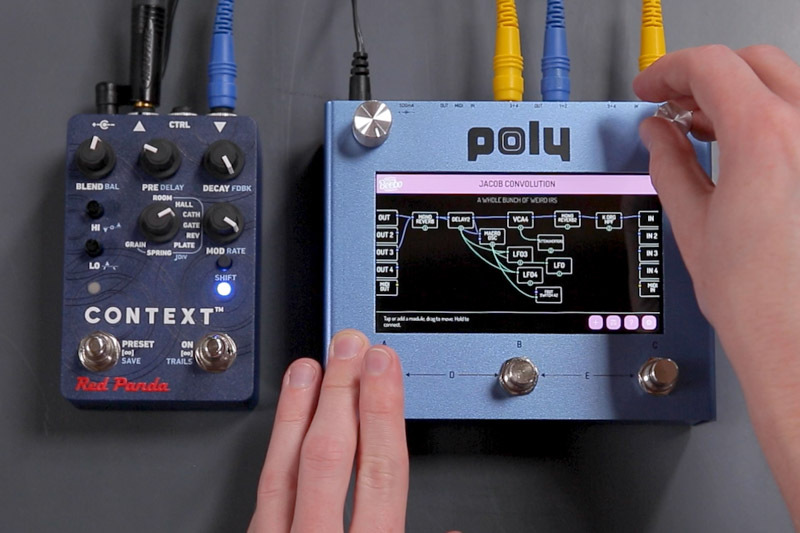
But aside from the defined file limits of whatever processor is being used, there's no hard rule saying you can only use impulse responses for convolution. Nothing is stopping you from imparting the character of any audio file onto anything else! For maximum weirdness, I pulled a few short clips from some experimental sessions with my Make Noise Mysteron and Ciat Lonbarde Sidrax and Plumbutter, turning any sound into a gurgling, bubbly mess. I did not perform any particular edits to the sounds beyond curating them from longer files, but applying simple things like fades will make them behave more like a real reverb.
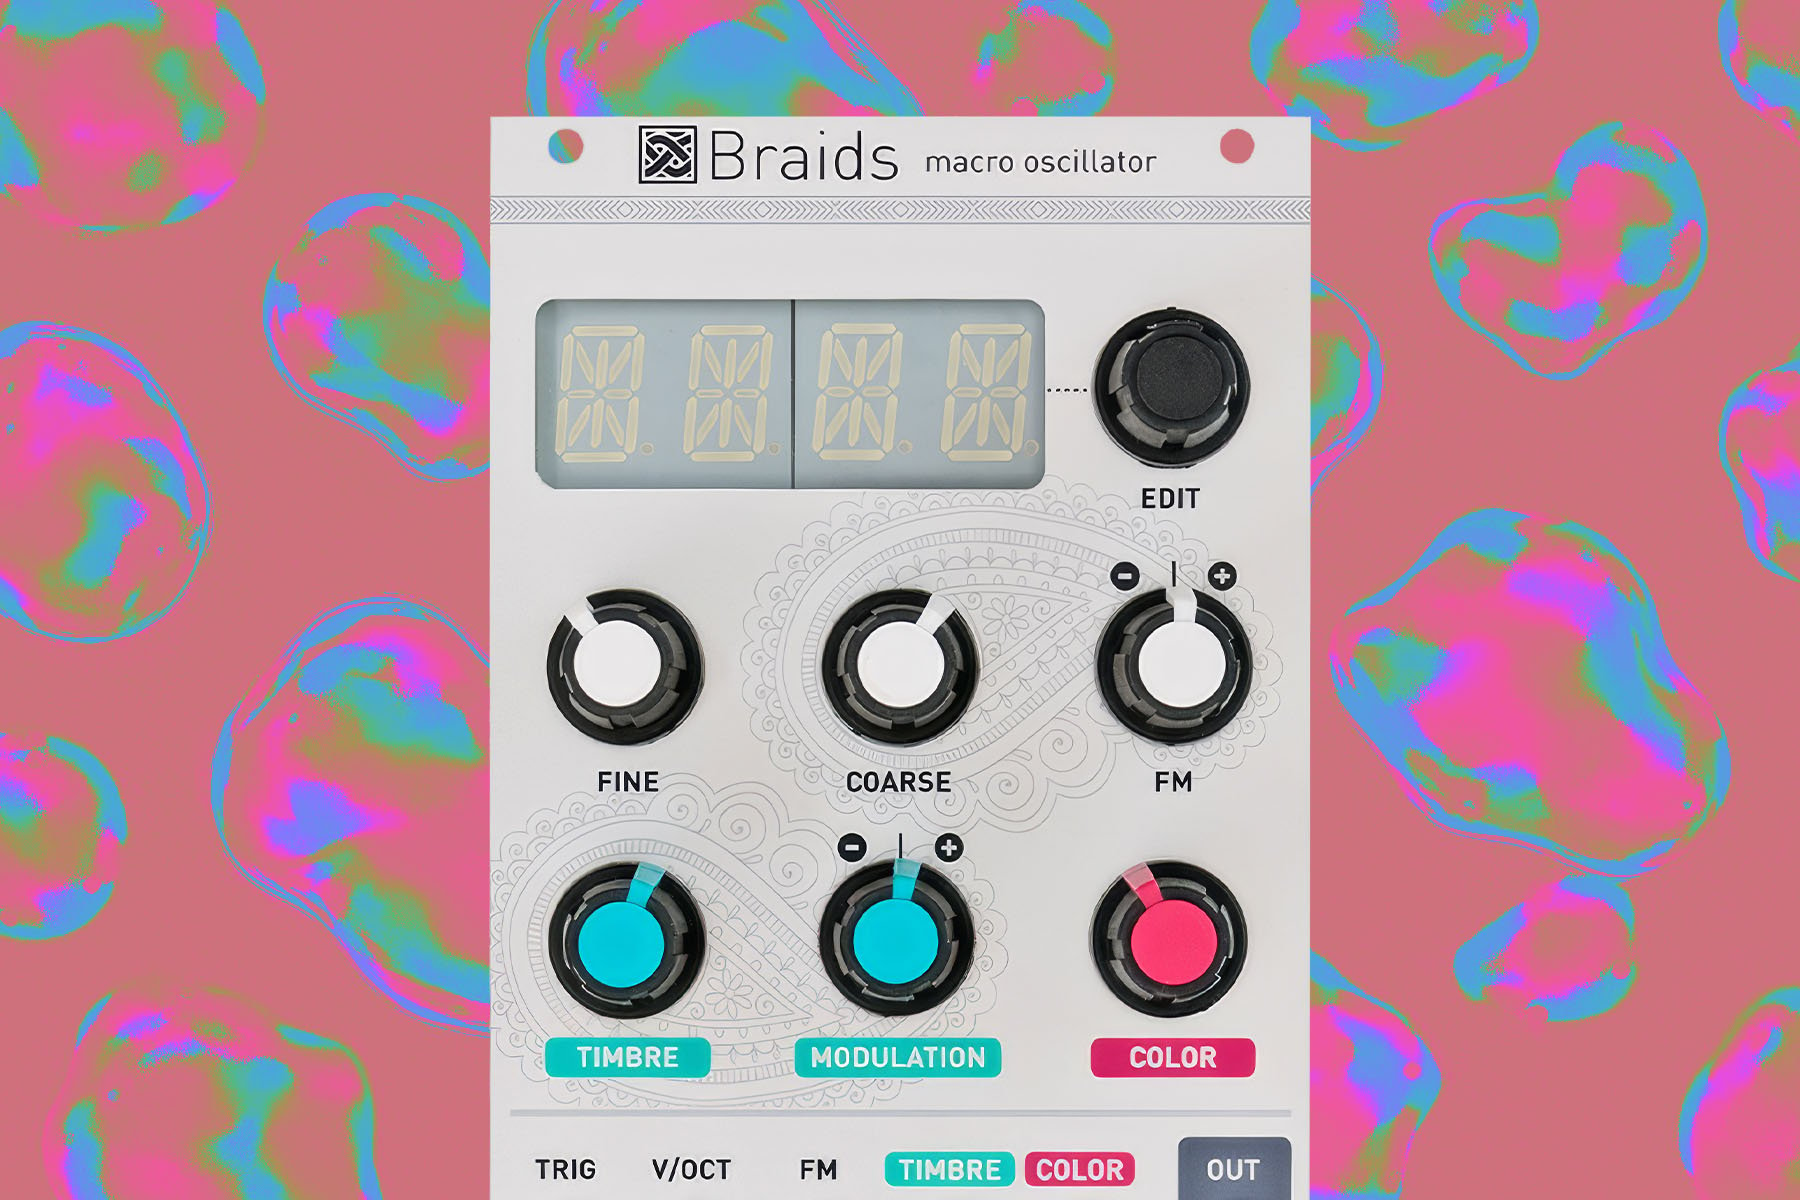
This setup relies upon the Poly Effects Beebo, which now contains all of the convolution power of the Digit merged into the Beebo firmware. To excite our convolution effects, I'm using a short burst of noise from the Macro Oscillator module (a port of the Mutable Instruments Plaits source code), and using one of Beebo's four outputs to route it back into itself for convolution feedback. With the way convolution works, using your own IRs makes the resulting feedback really unpredictable, so my Beebo patch included a high pass filter and the knobs mapped to the feedback level control to avoid rumbling sound buildup. We also brought out the Context again for some traditional reverb usage to fill up the sound.
All of these ideas can certainly be explored further, and even combined for new variations and additional layers of unpredictability. Best of all, you don't necessarily need to have the newest, fanciest reverb around to achieve interesting results. In fact, some of the most fun is to be had with simple effects in straightforward settings, and you'll likely hear something completely different every time. Feedback patching is an exploratory endeavor—one that welcomes practice and refinement like any other creative process, and even when the sounds are unpredictable, intuition will come into play and can lead to some remarkable results.
Some of Our Other Favorite Reverbs
 Eventide H90 Harmonizer Multi-Effects Pedal
- STAFF PICK
$899.00In Stock Available immediately! OTO Machines BAM Space Generator Reverb$669.00Preorder Reserve your order today!
Out of Stock
We're awaiting our next batch of this item. Pre-order to reserve your place in line and we'll fulfill your order as soon as we receive our shipment Make Noise Erbe-Verb DSP Reverb 20hpNo Longer Available Contact us for a recommendation.Out of stock