We recently shared an article about cases for Eurorack modular synthesizers aimed towards newcomers to this intriguing world of sonic exploration. These days, it's common for cases to come preloaded with a rock-solid power supply that's capable of providing all of the proper voltages that your modules require. But even after your case comes home with you, or if you need to source your own power solution, there still might be some lingering questions. How much current does my power supply offer? What's the correct orientation for plugging in ribbon cables? What is reverse-polarity protection, and do my modules have it?
In this article, we'll cover the specifics of power for both the power supplies themselves as well as the modules that they'll be powering, and offer some general advice to keep in mind as your modular journey continues.
Eurorack Power Essentials
As mentioned in the prior article on cases, we can turn to Doepfer, the originator of the Eurorack format, to enlighten us on the general specifications of Eurorack power supplies. On this technical details page for the A-100 System is a thorough overview of the essential power specs for Eurorack as a whole. Perhaps the most important detail is that Eurorack power supplies, as is the case with most synthesizers and professional audio equipment, produce multiple different voltages to sufficiently power modules. Specifically, a PSU for Eurorack systems will generate voltages at +12V, -12V, and +5V.

Most modules tend to only require the dual 12V rails, but some modules may need some amount of +5V current to function. These are usually modules that contain some amount of digital circuitry, especially if the module in question is an older design. However, these days it's rather common for such modules to contain internal voltage regulation that converts some amount of 12V current down to 5V, eliminating the need for the PSU to even offer a 5V rail. Most cases do still provide a supply of 5V current if needed, but in the event one isn't present, there are options like the Doepfer A-100AD5 and Klavis NoDrain that can turn excess +12V or -12V respectively into 5V. Of course, these should only be used if your power supply does not already have a 5V supply—otherwise, using one of these power regulators will likely cause damage to your modules or PSU.
All About Ribbon Cables
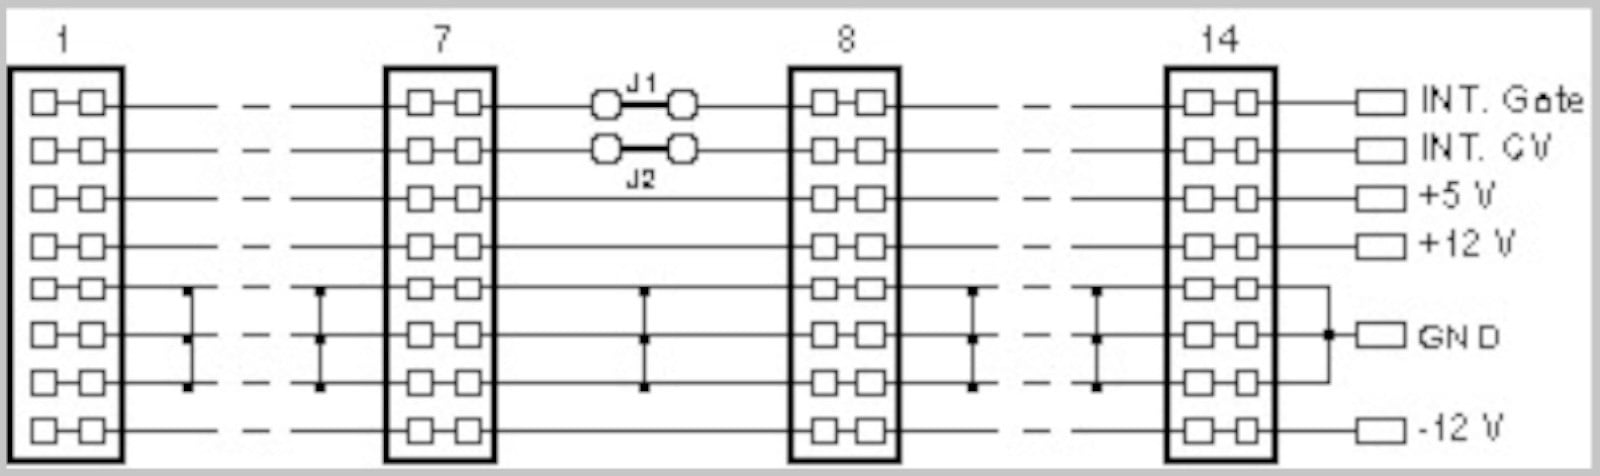
Power distribution to Eurorack modules occurs over ribbon cables with IDC connectors, with a standardized layout to apply the voltages from specific pins on the supply to the correct places on the module. As mentioned in the Doepfer technical details page linked above, certain voltages and ground lines are designated to specific pins, and thus requires a bit of diligence and attention to detail in plugging things in, ensuring that the proper voltages are sent where they need to go.
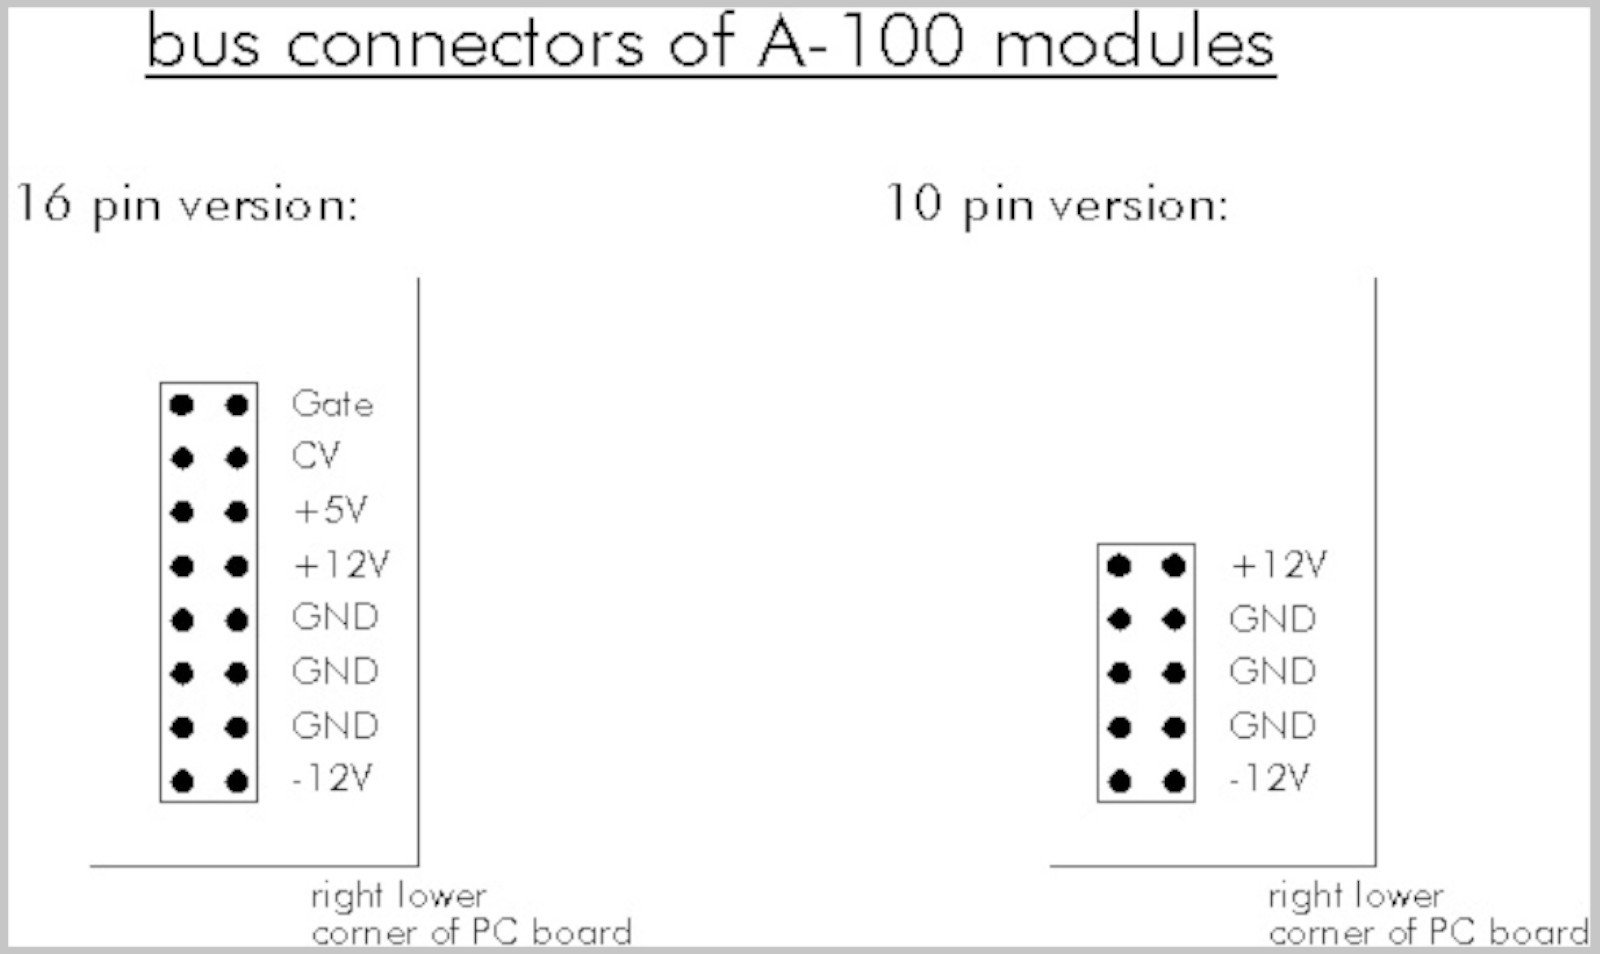 Diagram of Eurorack power header pinouts (image from Doepfer)
Depending on the requirements of the module, it's common to see two different header configurations. Power supplies distribute their voltages and ground across 16-pin headers in an 8x2 layout, but some modules can get away with only needing ten of these pins. If a module solely requires +12V and -12V power and does not need the +5V rail, it's common to use a ribbon cable with a 16-pin header on the PSU end, and a 10-pin header on the end which connects to the module.
But as it turns out, access to the +5V rail isn't the only thing offered by a 16-pin connection. As part of their initial power specification, Doepfer included two additional lines reserved for transmitting control voltages through the power bus, affording internal CV and Gate connections to compatible modules without requiring patch cables. As it was originally intended, this could be super handy for transmitting control signals from a MIDI-to-CV converter like the A-190-4 to oscillators and envelope generators like the A-110-1 and A-140, respectively.
However, the CV and Gate busses end up unused in a lot of systems, so some module makers have repurposed these lines for a digital communication protocol known as the Select Bus. Functioning as a sort of spin-off of the MIDI protocol, certain modules like the Make Noise Rene and Tempi, Malekko's Voltage Block and Varigate series, and others utilize the Select Bus for synchronization, both in terms of clocking and tempo as well as storing and recalling presets.
Red Stripe Down, Reverse Polarity Protection and Keyed Headers
As mentioned above, care should be taken to ensure that modules are plugged in correctly. Misaligning the pins or plugging a cable in backwards can send voltages to the wrong places and potentially wreak havoc on sensitive components.
 A-100 Power Bus (image from Doepfer)
These days, reverse-polarity protection is common, so the worst that will usually happen is that a module or PSU simply won't turn on. However, this isn't a universal feature, especially on older designs, and should not be relied upon as a safety net, lest you accidentally fry your prized collection of discontinued modules. Some makers like Michigan Synth Works and Rossum Electro-Music have slightly deviated from the Doepfer specifications, in that some of their respective modules can be plugged in either way or simply re-route voltages to unconnected pins, avoiding any potential damage.
How does one know how to plug in their modules then? More often than not, designers will put some kind of indication on the PCB next to the power header. In designing the A-100 System, Doepfer adopted the practice of ensuring that the +12V rail was towards the top of the module, while the -12V rail would be towards the bottom. As the -12V current would often be transmitted upon the side of the ribbon cable with the red stripe on it, plugging in modules with the "red stripe down" became the general practice for power orientation. Of course, when in doubt, always inspect the PCB for labeling or indication of how power should be connected, and if you're truly unsure, contacting the manufacturer is the safest thing to do.
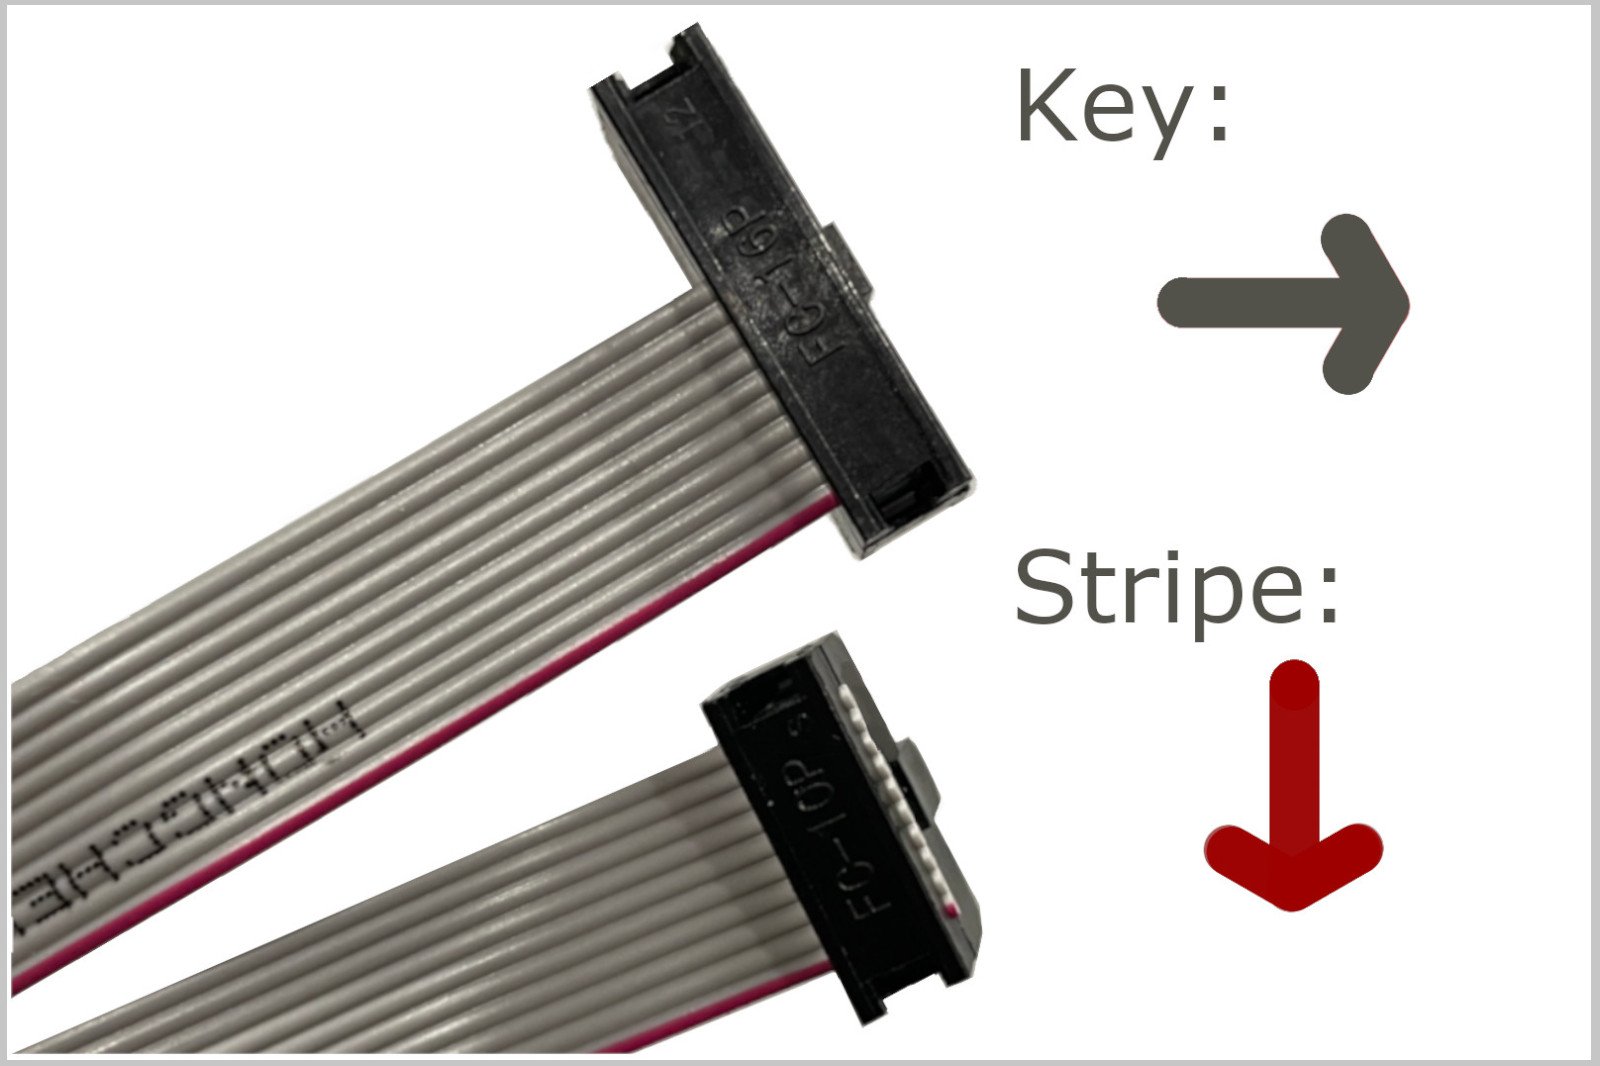 A helpful diagram for checking keyed ribbon cable headers
To aid in the process of connecting modules to their power supplies correctly, many have adopted the use of headers which may only allow connections in a specific orientation due to their physical design. On the ribbon cable, these headers are generally referred to as being "keyed," while the associated receptacle on the power supply is known as a shrouded header. While they can aid in connecting modules to power supplies, it's crucial to ensure that your ribbon cables are, in fact, keyed correctly. Mistakes do happen from time to time, especially if you're crimping your own power cables, but it's worth quickly inspecting the cables packed with your new modules, too.
So which way is correct for keyed cables and shrouded headers? When looking directly at the back of the module and referencing the Doepfer power specification with -12V placed on the bottom row of pins, the tab or slot of the connector or shrouded header should be pointing to the right. The cable itself might extend in one direction or the other, depending on how it was made in order to accommodate the PCB layout of the module in question, but as long as the key is rightward facing in relation to the -12V line being at the bottom, you'll see no issues in powering your module.
What's the Difference Between Linear and Switching Power Supplies?
At some point in researching power supplies, it's likely that you'll stumble upon the terms "linear" and "switching" being used to define types of power supplies. Indeed, the question of whether one is better than the other extends well beyond the niche of Eurorack and into the greater world of general electronics. Of course, technical details are beyond the scope of this article, but we'll go over the basics as they relate to our interests in synthesizers.
 L-1 Linear PSU Eurorack Power Supply - Version A$260.00Preorder Reserve your order today!
Out of Stock
We're awaiting our next batch of this item. Pre-order to reserve your place in line and we'll fulfill your order as soon as we receive our shipment
Linear power supplies are fairly straightforward in their operation, and if you have a grasp of concepts in synthesis like rectification it's easy to understand. At their input, linear PSUs take in an AC mains voltage, like 120V here in the United States or 230V in Europe, and use a transformer to scale it down to a much lower level, like 15 or 24V. From there, full-wave rectification is applied to convert the resulting bipolar AC voltage into a unipolar DC signal, with subsequent filtering in place to smooth the fluctuating signal into a steady voltage. Thus, linear power supplies are comparatively simple in their design while producing output with low noise, but it should be noted that the large transformers and capacitors required make this kind of PSU fairly bulky, and a decent amount of energy is lost to heat in the process.
On the other hand, switching power supplies are able to operate more efficiently and in a smaller form factor in comparison to linear designs. Here, the input AC voltage is dropped down to the output DC voltage via high-frequency switching, a process that offers much better performance than using transformers, and can be consolidated into a much smaller package. But it is this high-frequency modulation that can produce noise and ripple that is characteristic of switching power supply designs, and depending on the rate of switching may or may not be audible. However, PSUs that are specifically designed for use in a Eurorack system will have protective filtering and precautions in place to avoid negative artifacts being present in your patches.
Usually, the noise of a switching Eurorack power supply is tuned to be much higher than the range of human hearing, so noise bleeding into the system won't be audible. However, there is one particular instance where this may still come into play: video synthesis. Given that video rate oscillators and other functions involve frequencies that extend well up into the megahertz range, certain switching supplies can produce visible ripple into video signals. For this reason, video-synth experts LZX Industries generally advise using PSUs that are primarily linear in design—LZX co-designed the now discontinued Malekko Power Supply, but I use a Doepfer LC6 with a PSU3 for my personal video synthesis setup and it works marvelously.
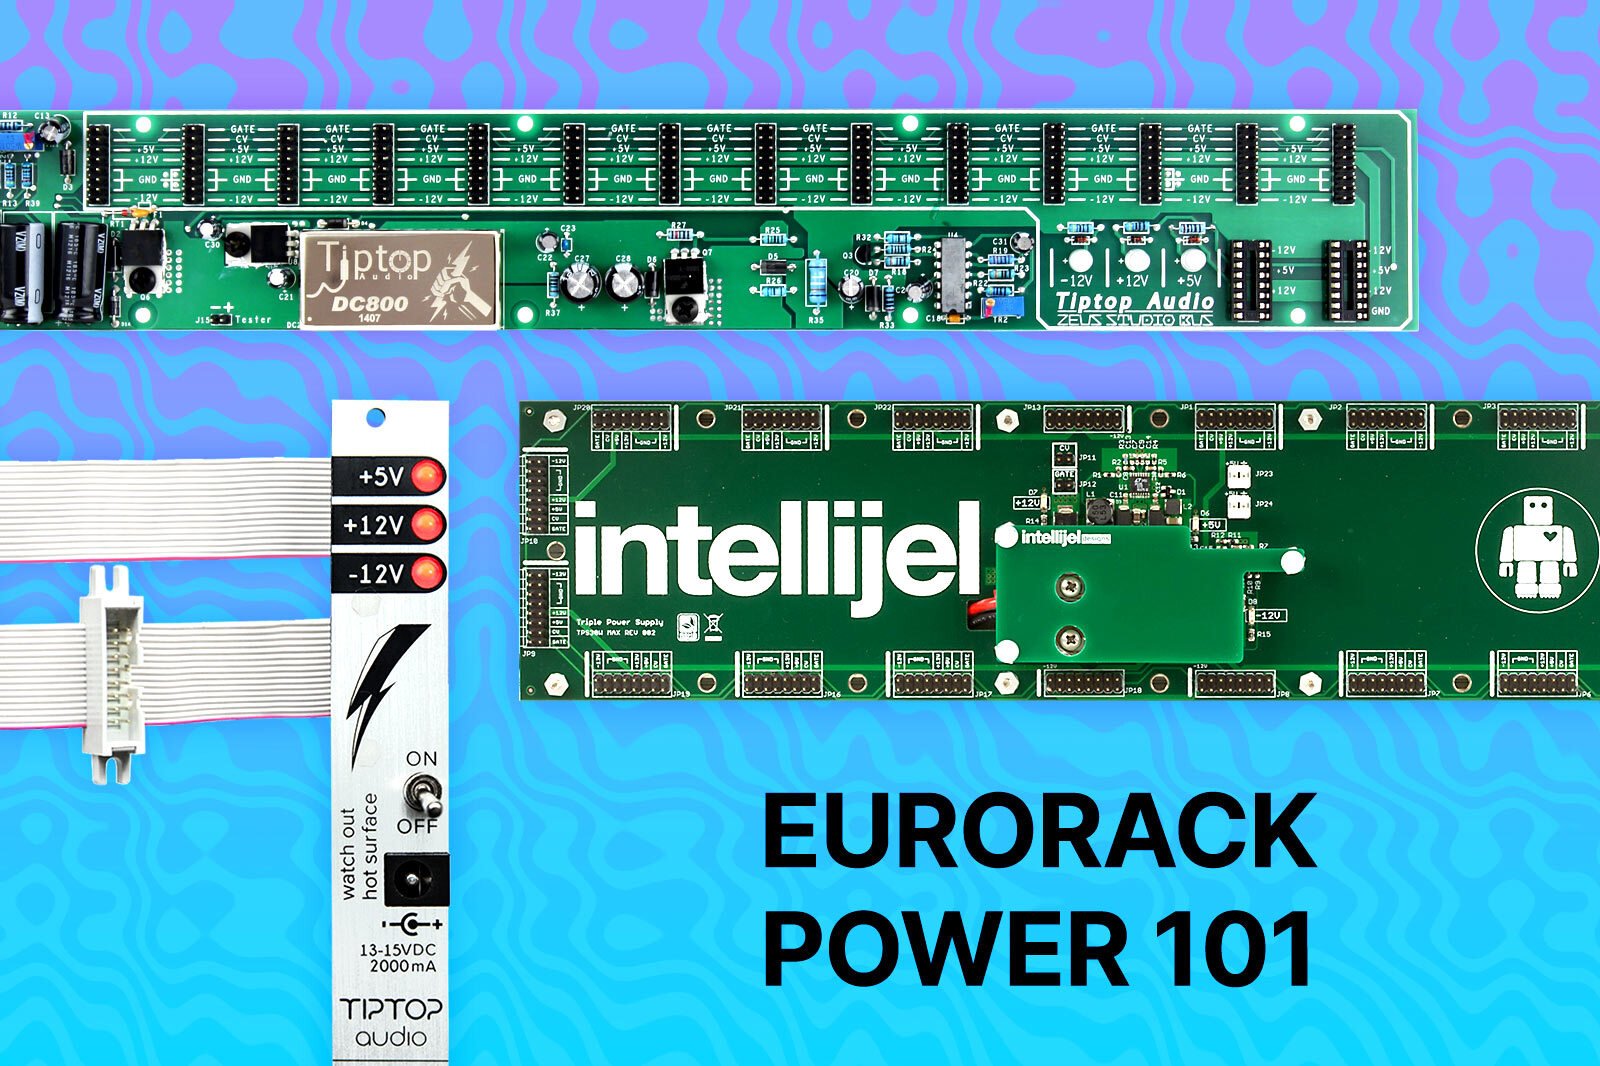
Types of Eurorack Power Supplies
As far as Eurorack power supplies are concerned, they can come in a number of different shapes and sizes, from being housed within modules or operating as a dedicated unit mounted within a case. Which type of power supply is best for your synthesizer needs? Read on to find out.
 Doepfer A-100PSU3 Power Supply$189.99Preorder Reserve your order today!
Out of Stock
We're awaiting our next batch of this item. Pre-order to reserve your place in line and we'll fulfill your order as soon as we receive our shipment
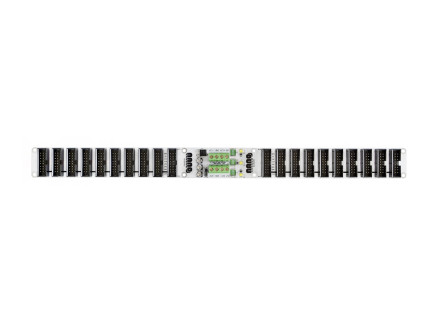
Since modular synthesizers originated as a studio tool, large bulky power supplies were commonly mounted within the cabinet that housed the instrument. While power supply designs have come a long way since then, it's still common to find cases with an integrated power solution inside. Some designs like the Doepfer PSU3 or those found in the Pittsburgh Modular Structure cases do all of their voltage conversion internally and simply need an IEC cable, while others will need an external power brick.
Typically a more affordable option, power supply modules are a common and easy way to get a system up and running. They look like any other Eurorack module, except that they often have a barrel jack for connecting a designated power brick. By sacrificing a few HP of module real-estate, this also eliminates the need to modify the case itself in order to accommodate mounting a PSU or busboard inside. This makes power modules an excellent choice for simpler DIY projects, but they're a totally viable option in any case that needs power.
Dependable Power Modules
 ACL KAZU V2 Eurorack Power Supply 4hp$319.00Preorder Reserve your order today!
Out of Stock
We're awaiting our next batch of this item. Pre-order to reserve your place in line and we'll fulfill your order as soon as we receive our shipment
 Tiptop Audio uZEUS w/ Flying Busboard (w/ PSU)$110.00Preorder Reserve your order today!
Out of Stock
We're awaiting our next batch of this item. Pre-order to reserve your place in line and we'll fulfill your order as soon as we receive our shipment
Types of Power Distribution in Eurorack Systems
 NANO Modules BUSBOARD Passive Distro Board$44.99Preorder Reserve your order today!
Out of Stock
We're awaiting our next batch of this item. Pre-order to reserve your place in line and we'll fulfill your order as soon as we receive our shipment
Just as there are different types of power supplies, there are different ways to distribute power within a case. When it comes to power distribution, the type of power supply used might have an impact on which method is best for your system.
One method of dispersing power in a case is through the use of bus boards. Traditionally, installed power supplies are linked to bus boards placed throughout the case, which offer headers to connect with modules. Due to the wide variance in power supply designs, it's common to see two types of boards: passive and active. Passive busboards simply connect with a supply and distribute their power, sometimes offering additional stages of filtering to reduce noise and ripple. Usually, they'll connect to power supplies via wires which are soldered or hosted in spring or screw terminals, and in most cases will support some amount of daisy chaining. So if you're installing a large studio system and need some more headers but still have plenty of headroom on your power supply, throwing in another passive bus board can get you up and running.

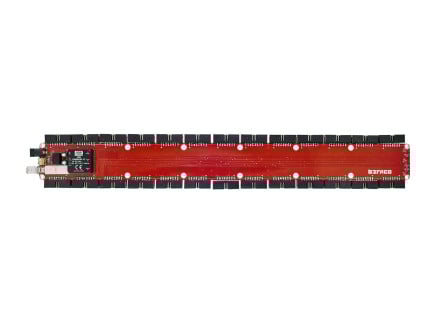
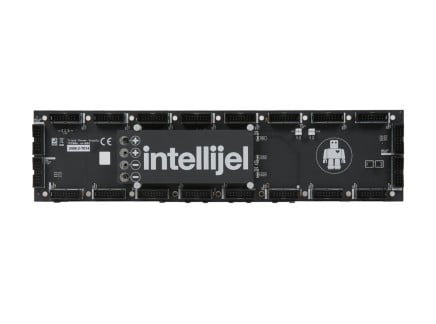
On the other hand, active busboards themselves function as power supplies, occupying a footprint that's comparable to passive boards. The Tiptop Audio Zeus Studio Bus busboard, for instance, is an extendable unit designed for studio applications, but there's no reason it couldn't be used in a travel case! In fact, the Intellijel TPS80W is a similar design and serves as the heart of their renowned 7U Performance Cases. Certain active busboards may be daisy-chained as well, but consult the manual or manufacturer themselves to ensure connections are being made correctly and safely.
Most commonly used with power modules, daisy-chained ribbon cables are by the far the most affordable distribution method for powering Eurorack modules. Tiptop's uZEUS comes with two Flying Busboards—extended ribbon cables with shrouded headers which may be used to connect the cables connected to the modules themselves. Alternatively, the 4ms Multi-Pin cables are a more space-efficient option, assuming that you're exclusively connecting modules that accept ten or 16-pin connections. Of course, by daisy-chaining modules together the chance of introducing noise or cross-talk increases when compared to using isolated outputs, but in a pinch and within extreme portable setups, this is often the best option.
Busboards and More
 Intellijel Designs TPS30 MAX (Triple Power Supply) – 30W 3U / 6U Busboard$139.00In Stock Available immediately!
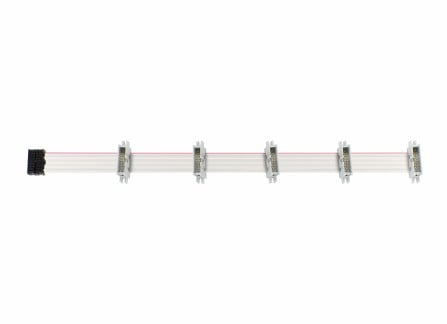 Tiptop Audio uZeus Flying Busboard Cable$15.00In Stock Available immediately!
 4MS Bus Stick Eurorack Power Board (Keyed Headers)$40.00In Stock Available immediately!
Keeping Track of Current Draw
While it would be nice, power supplies are not an infinite reserve of current that can support an infinite number of connected modules. It's important to keep track of how much current each module needs on its +12V, -12V, and, if applicable, +5V rails to function properly, and to be sure that your chosen power supply can supply more than enough current for all of your favorite modules. We do our best to keep product specs up to date on our website, but when in doubt, information about how much current can be supplied by a PSU or how much a particular module will draw will almost always be found in its manual.
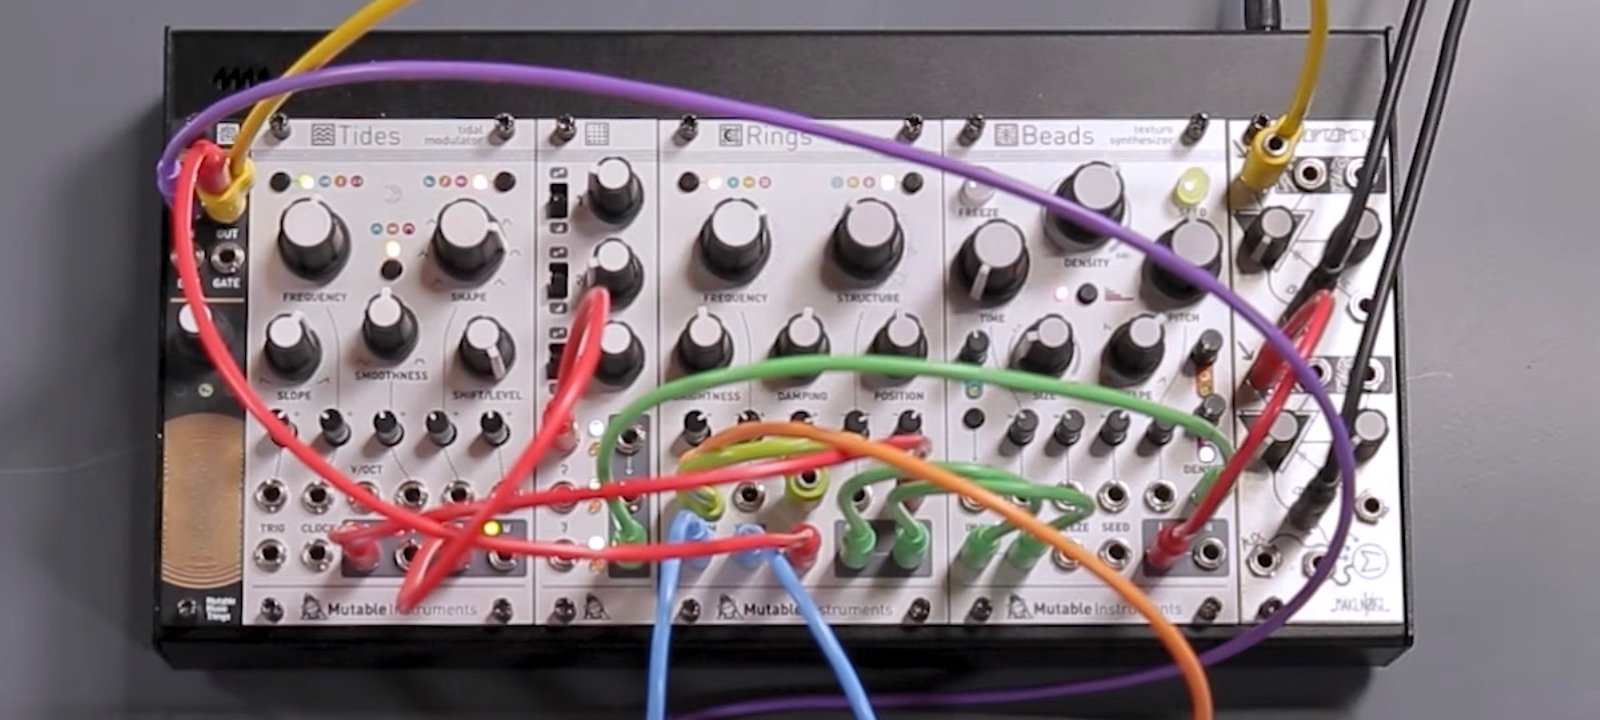
For a quick real-world example, let's imagine we're loading up a powered 4ms Pod 60 with a handful of modules. Our total available power is 1400mA of +12V current, 560mA of -12V, and 400mA of +5V when used with the associated power brick, and we'd like to install Ears, Tides, Shades, Rings, and Beads from Mutable Instruments, along with a Make Noise Optomix. Adding up all their respective current draws, we get a total of 305mA and 80mA on the +12V and -12V rails, respectively. This is well within what the Pod's power supply can provide, so we should have no issues in getting this fun little system up and running. Of course, power requirements for certain modules can vary greatly, so we generally advise leaving at least 15% of the listed maximum current available as extra headroom to avoid over-taxing the power supply.
Keeping track of your power draw, especially in larger cases, can be difficult, but this is one of the best reasons to plan out a system on ModularGrid. For those that are unfamiliar, ModularGrid is a web-based application designed to assist in the occasionally daunting task of organizing a Eurorack modular synthesizer. In addition to providing an easy way to imagine prospective layouts for your systems, it handily keeps track of the total power draw for all the modules placed within the virtual case.
Tips for Troubleshooting Power Troubles

Inevitably, a day will come where a synthesist, experienced or not, might power up their system and find their modules behaving erratically or not turning on at all. But provided that you don't see or smell the dreaded "magic smoke" of fried electronics, this is usually nothing to worry about and can likely be resolved in a logical fashion. Of course, there are a bewildering number of possible configurations for Eurorack systems, so it will be impossible to cover every possible issue that could appear. But drawing from my own experiences in my personal systems and assisting friends and customers over the years, these are a few tips that should hopefully aid in solving issues of your own.
So what are the typical causes of Eurorack power issues? In a majority of situations, it's likely that there's a module connected to the power supply incorrectly. It could be plugged in backwards, or if the headers are not shrouded, the cable may be misaligned and thus connecting the wrong pins together. This is an easy thing to occur in the midst of rearranging the modules in your case, especially if you're in a hurry, so it's always worth checking to make sure that your modules power on before committing to their placement and screwing them in. If you swapped some cables around, be sure to check both the headers on the power supply as well as the headers on the modules themselves.
If the problem is still present after inspecting the connections, I find that it's typically wise to disconnect everything and plug modules back in one at a time until the issue surfaces again. This way, if the issue can be traced to a particular module, it should be more than apparent once the problematic module is powered up again. Another thing worth checking is the ribbon cable itself—they do fail from time to time, so I always have a couple of extras on hand for when I find the module causing trouble.
Other times, modules might start acting strange if their total current draw is approaching or surpassing the maximum current available in the power supply. If you've confirmed that everything was plugged in correctly, it may be worth double checking your math or plotting out your system on ModularGrid to ensure your modules aren't overly taxing the PSU. If you have modules that require +5V power, it's common for that rail to supply the lowest amount of current, so that might be the first place to check. Additionally, some modules may initially draw more current on power up than in their idle state, and if you suspect this might be the case, a device like the (now-discontinued) WMD Soft Start can delay the onset of current on the +12V rail. This is a common trait of digital modules, but others like the tube-based Erica Synths Fusion line behave similarly. This is one specific reason why leaving some headroom on your power supply is a valuable thing to do.
It should now be pretty clear that Eurorack power is a broad topic, but not necessarily one that should be daunting. Eurorack as a format has matured considerably over the years, and a lot of the headaches of sorting out deeper power issues have been addressed and simplified by the bright minds making modules and instruments. That said, everyone needs to think about power from time to time, and there's always some amount of planning and thought that should go into powering your dream instrument. Everything stated in this article should equip you with all of the power knowledge you need to go out and make that dream a reality.
Some of Our Favorite Power Solutions
 Intellijel Designs TPS80W Triple Power Supply Busboard (Type A)$239.00In Stock Available immediately!